How to remove something from a picture
Learn how to remove something from a picture with photo editing software. It’s easy to remove unwanted objects and people from your pictures with a little help from smart technology.
Introduction to photo object removal
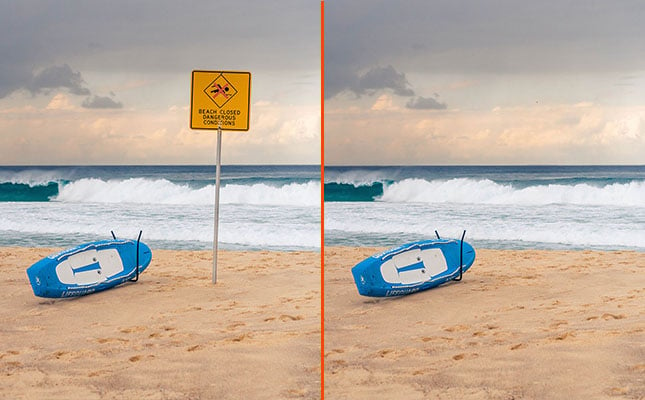
We’ve all been there: you take the “perfect” photo only to notice that something or someone has hijacked your shot.
It could be an ugly signpost, a stray branch or a passing tourist. In many cases, it is people or objects in the background of a photo that distract from the “main event”.
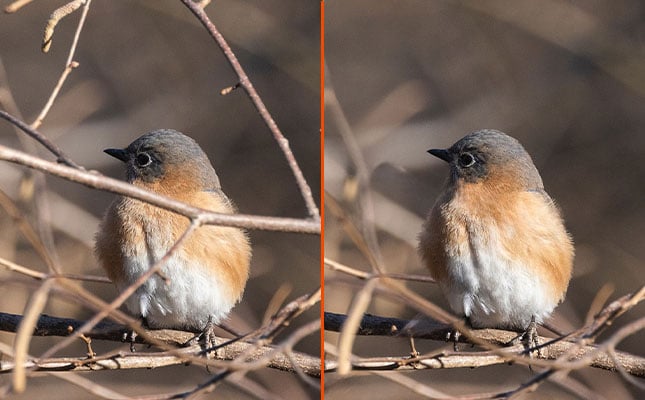
It can be tricky to remove something from a picture. This is because you need a way to reconstruct the area behind the removed item. If done with the wrong tools, you can end up with blurry patches on the photo that are just as distracting as the unwanted object.
Fortunately, photo editing software features increasingly advanced technology to help you remove unwanted objects and people and achieve distraction-free photos.
In this post, we’ll cover a few of the photo editing techniques and tools you can use to edit out people and other unwanted elements from your photos.
Remove something from a picture with spot fixing
A simple way to remove tiny objects or distractions is to use the spot healer in Windows Photos. This works for small marks or defects on the photo, such as dust spots, as well as blemishes.
Open your photo in Windows, then click Edit, followed by Spot Fix in the right hand panel. Use your mouse to zoom in and tap your mouse to select an area to fix.

Note that the spot fixing tool is no longer available in Windows 11, so you will need Windows 10 to do this.
AI-powered object removal
Many photo editors now provide AI-powered object remover tools to easily remove unwanted objects, while retaining image quality.
These tools are sometimes designed to remove specific items, such as power lines, at the touch of a button. The AI identifies these items in your photo, removes them, and fills in the background.
Other object removers allow you to select the item or person to remove. The advantage of this type of tool is that you can erase different types of elements. You also have full control over which areas of the photo are removed.
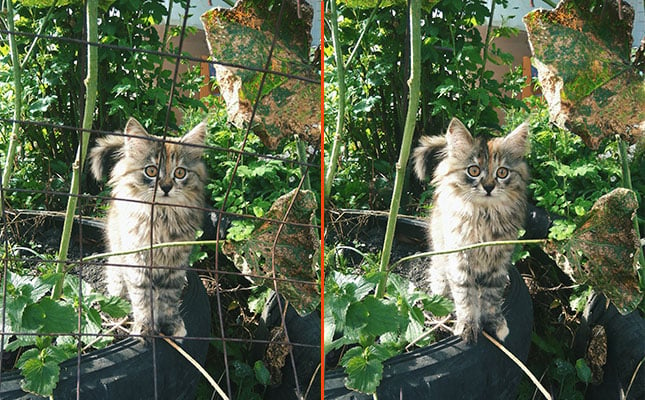
AI technology can recreate increasingly complex backgrounds in the object removal process. It does this by analyzing the entire photo, including elements such as structures in the background. The AI can then better predict and recreate what was behind the removed object.
In the above example, edited with inPixio Photo Studio, you can see that the AI has recreated the cat’s fur as well as the leaves in the background.
In the next example, the AI has successfully reconstructed the staircase behind the people.
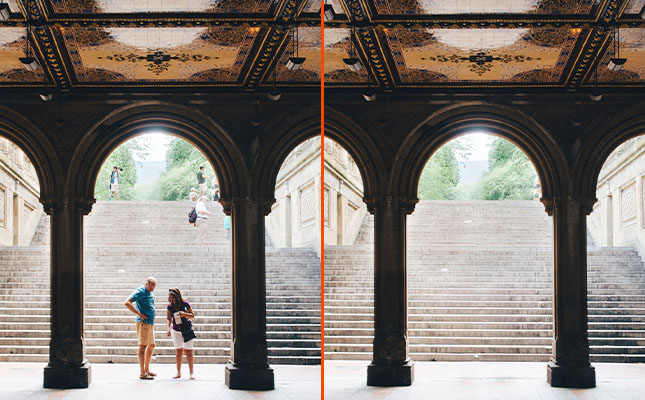
Although they are improving all the time, AI-powered tools are not always 100% perfect. If the photo has a very complex background you may need to do some extra editing to get a seamless finish. We’ll look at this in the next section on cloning.
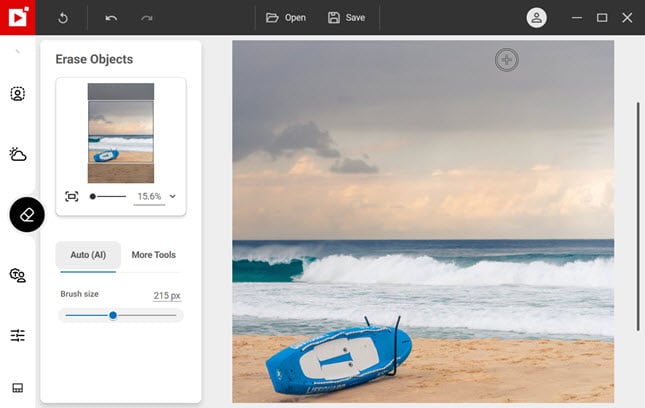
How to remove something from a picture with inPixio Photo Studio
- Select the Erase Objects tab
- Use your mouse to highlight the object you want to remove
- AI technology analyzes the photo and removes the object
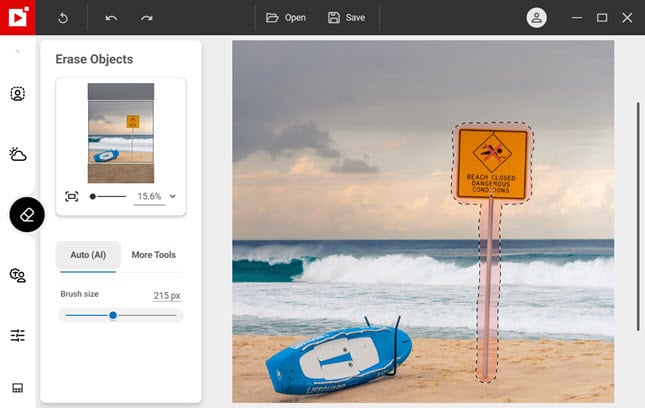
Remove something from a picture with a clone tool
In addition to a spot healer or AI removal tool, most photo editors also provide another advanced editing tool: the clone stamp.
A clone stamp tool works by copying, or “cloning” an area of your photo, which you can then use to retouch other parts of the photo.
So instead of removing an object, you effectively hide it by pasting new content on top.
The clone stamp tool is very handy in lots of different photos. What’s more, you can use the clone stamp together with an AI-powered tool for even more realistic results.
Start by removing unwanted objects quickly with the AI tool, then use the clone stamp to touch up areas of the background that were not perfectly reconstructed by the AI as in the video above.
How to remove something from a picture with the clone tool in Photo Studio
- In the Erase Objects tool, select More Items – Clone
- Click the area on the photo you want to clone – known as the “source point”
- Click again to paste the cloned content over the desired part of the photo
How to edit people out of photos
The basic process for removing an unwanted person is the same as for removing objects. Start with an AI tool, especially if the background is fairly uncluttered. Then, if necessary, use the clone tool to “fill in” areas of the background.
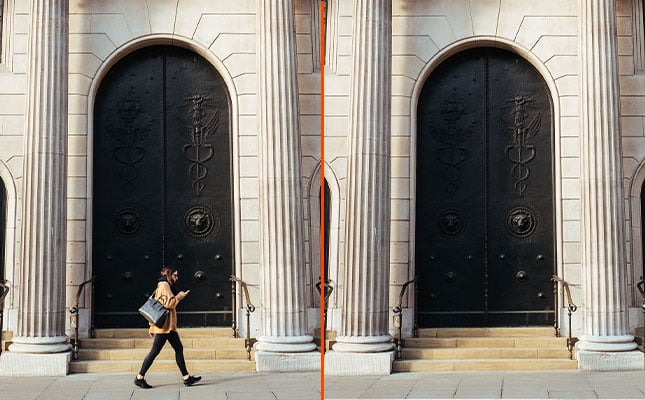
Editing unwanted people out of a picture is often more difficult than removing objects. If you want to edit out multiple people from a photo, another approach is to remove the entire background and replace it with a new one. This can be faster than removing people one by one.
Similarly, you can use image blur to disguise people in the background of a photo. This also has the advantage of giving your photo a professional look and bringing the focus to your subject.
What other unwanted elements can I remove?
As well as unwanted objects and people, you can use object removal tools to do further retouching on your photos. Here are a few examples:
Remove blemishes or wrinkles
Object removal tools such as spot healers, AI tools and clone are great for removing skin “defects” such as blemishes or wrinkles from your portrait photos.
Remove unwanted text
Text, such as date stamps on older photos, can be easily erased using an AI object removal tool.
Restore old photos
On old photos, you can use object removal to erase creases, stains and other signs of damage.
Why not download the free version of Photo Studio and try removing objects using the steps above?
Learn more about erasing objects with Photo Studio.

